API authentication with ASP.NET Core 3.0 and Firebase
Nowadays, creating a new web API is easy but securing it can quickly become a struggle.
Obviously we want to do it right, for the best value at the minimal cost, so creating and maintaining an authentication provider is not an option.
There are multiple ways to get a user store, the one we’ll be using is Firebase. It is free, easy to use and provides with all the options we need (like signing in with email/password or with a Google account).
This article provides with the minimal information to have it working, more complete source code is available on GitHub.
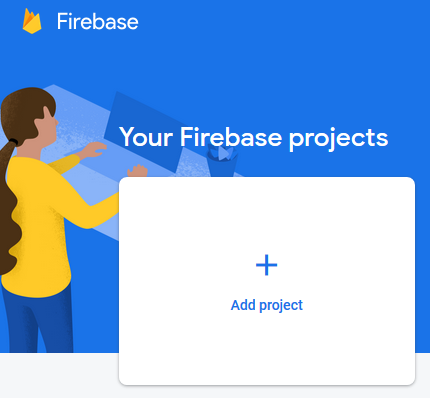
Firebase project
You need to register/authenticate and create a project in Firebase. It is free and will take only a few minutes.
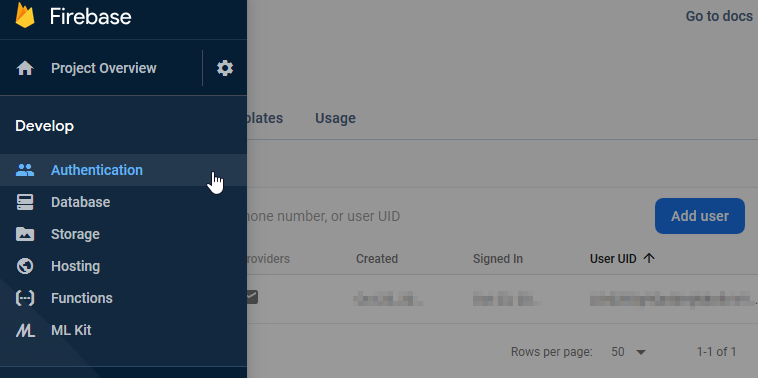
Once the project is created, you can create a user to make quick tests. To do so, click on the “Authentication” link from the left menu and click on the “Add user” button.
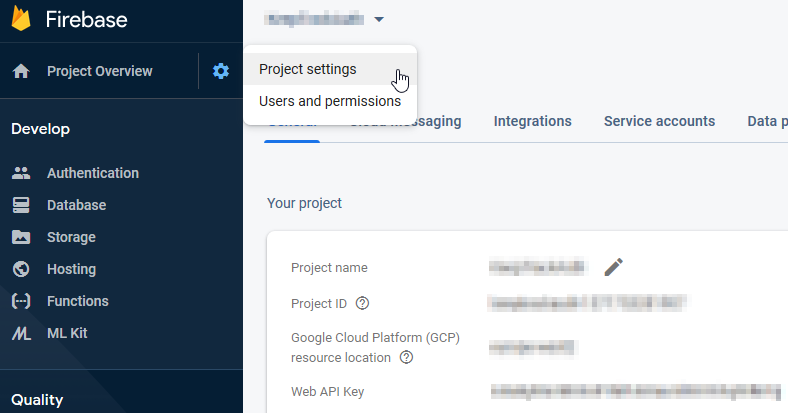
Go to the project settings (from the wheel icon) and save important information for later: “Project ID” and “Web API Key”.
ASP.NET Core 3.0 API
.NET Core is an amazing technology which is free, cross-platform and open source with a huge community. Version 3.0 has just been released and filled the functionality gap with the original .NET Framework.
.NET Core 3.0 SDK is the only requirement, it must be installed on your computer. This is easy to check, just execute this command line: dotnet –version. If dotnet is unknown or the version is not at least 3.0.100 then you can install it from dot.net.
There are multiple ways to create a new .NET application, you can do it from the command line: dotnet new webapi –name MyApi, or you can look at the official documentation to do it in Visual Studio.
Before doing anything else, make sure the project compiles without error with dotnet build and it runs with dotnet run.
It’s surprising how very few files are needed to make it work, take a look if you’re not familiar with it!
Here are the steps to secure your API with Firebase.
- Install packages (NuGet): Microsoft.AspNetCore.Authentication.JwtBearer
- Update your Controllers to add [Authorize] attribute to your class or method.
- Update the Startup class with the following add-ons.
public void ConfigureServices(IServiceCollection services)
{
    services
        .AddAuthentication(JwtBearerDefaults.AuthenticationScheme)
        .AddJwtBearer(options =>
        {
            options.Authority = "https://securetoken.google.com/my-project-id";
            options.TokenValidationParameters = new TokenValidationParameters
            {
                ValidateIssuer = true,
                ValidIssuer = "https://securetoken.google.com/my-project-id",
                ValidateAudience = true,
                ValidAudience = "my-project-id",
                ValidateLifetime = true
            };
        });

      services.AddControllers();
}

public void Configure(IApplicationBuilder app, IWebHostEnvironment env)
{
    if (env.IsDevelopment())
    {
        app.UseDeveloperExceptionPage();
    }

    app.UseHttpsRedirection();

    app.UseRouting();

    app.UseAuthentication();

    app.UseAuthorization();

    app.UseEndpoints(endpoints =>
    {
        endpoints.MapControllers();
    });
 }
Make the test again on your API, you should have a nice 401 error (unauthorized). So how do I go from there?
Create a token
In order to test the API we need a valid token generated by Firebase. The easiest way to do this is use Firebase REST API thanks to the documentation.
If you’re not familiar with REST calls, you can use Postman which is a great free tool to do web calls (and save them in collections).
To do a log-in with email/password (the ones we created manually before), the URL for the POST request is https://identitytoolkit.googleapis.com/v1/accounts:signInWithPassword?key=[API_KEY] and here is an example of request body (obviously change the email and password).
{
  "email": "myemail@address.changeme",
  "password": "mysecretpassword",
  "returnSecureToken": "true"
}
You should have a successful reply, assuming you provided with a valid token (limited in time) in the idToken field.
{
  "kind": "identitytoolkit#VerifyPasswordResponse",
  "localId": "****",
  "email": "****",
  "displayName": "",
  "idToken": "****",
  "registered": true,
  "refreshToken": "****",
  "expiresIn": "3600"
}
Secure call to the API
Here it is, the final step, you have everything to validate your API!
You can use Postman or any other web request tool. Or you can look at the code sample on how to add swagger to your API (a little more code but a little more fun 😎).
If you’re not familiar with JSON Web Token (JWT) there are many resources on the web but you can start by this website: jwt.io.
The very important information to know is the token is the key element that will secure the calls to the API and will give the user authentication information to the API (you can look at it in debug in Controllers through the User property).
In the REST call this token is located in the request Headers fields, called Authentication, with the value “Bearer xxxxx” where xxxx is the token.
That’s all for now, please leave a reply or contact me directly on Twitter if you have any question or remark.

- Install Rancher on Azure Kubernetes Service (AKS) - September 25, 2023
- Automate NeuVector installation and management with Fleet – The GitOps way - August 25, 2023
- AKS startup error: Token refresh failed with invalid client secret error - August 22, 2023
36 thoughts on “API authentication with ASP.NET Core 3.0 and Firebase”
Hi! Thanks a lot for your tutorial. I thinks it’s really useful. Keep going with this kind of content, really appreciate your effort.
Hi George, thank you very much for your kind message. Appreciate it 🙂
Hey Bertrand, nice tutorial, simple but so useful, really cool!
Thank you! I’m glad if it can help other developers.
Thank you Bertrand.
How about to redirect to Firebase for Google authentication?
Thank you for asking.
The goal of this article is to secure calls to an API, that should be possible in all cases, in particular from an another API (not a human interface). We could redirect the HTTP call to a Google web login page but that is not API RESTful compliant. One could do it in a case where the API is inside a web application (such as the one provided by .NET template webapp, with Razor pages for example).
On a good note though, it’s easy to plug this redirect login behavior with Firebase from a web application, this is what I did with my pet-application (angular front): Keep track.
By the past, I used to secure APIs with ADFS (with HTTP redirect) but it was too restrictive and complicated with an AngularJs frontend.
How use this with simple .Net Web Api?
What do you mean by simple .NET Web Api?
If it is old .NET Framework (even on 4.7), it won’t work as it requires .NET Core and I would strongly encourage using .NET Core 🙂
It if is a basic .NET Core Web Api, then it will work fine. You have an example here: https://github.com/devpro/keep-track/tree/master/dotnet/src/Api
Almost everything is done in Startup class, as intended by .NET Core guidelines.
But I want this with ASP.Net Web Api 4.x
Former ASP.NET Web API has been deprecated by Microsoft, in favor of ASP.NET Core. It’s way easier and better to develop with, cross-platform (Linux), huge performance.
Unfortunately I think you won’t find something easy to do the same with ASP.NET Web API as the .NET community has switched to ASP.NET Core. But if possible, I would strongly migrating to ASP.NET Core (that can easily do both API and Web App).
Thanks for your advice. Now I am thinking to switch.
Very nice article. It helps lot. But my question that, How asp.net web api (Standard framework) for same?
Bertrand, thank you very much for sharing!
I do have a question. I noticed that the token myk client application obtained expires after 30 minutes or so. I’m not sure if the token expiration is happening on the .NET Core api logic or by Firebase. Any ideas?
It would be great to have a post about how to register a user through Firebase Auth with Phone in ASP.NET. Thanks !
Hi;
I think the source code link you provided is for another project (Angular 8).
Where is the link for this project?
Hi, the source code contains both applications: ASP.NET Core Web API (in dotnet folder) and Angular Web Application (in angular-bootstrap folder).
Thanks!
Good blog, Bertrand. The information on how to authenticate with ASP.NET Core 3.0 with Firebase is nicely explained in steps. The entire process explained is easy to understand. The code given is a good way to explain the concept. The information provided will be useful for new developers.
Thank you very much. That’s really nice to read
Good Job Bertnand! very useful. My question is how a we can do the token verification at the backend side (using public keys). Specially with google login (by firebase obviously)? Thanks in advance!
Thank you Reynaldo, it’s nice to read positive comments 🙂
Would you have a concrete example?
In the current code, the backend (ASP.NET Core API), the authentication is done on the bearer token with information provided by Firebase. In the Startup file (https://github.com/devpro/keep-track/blob/master/dotnet/src/Api/Startup.cs), in the ConfigureAuthentication method. I don’t know if it’s what you are looking for.
Good information, I have a question, if I want to authenticate with google from firebase and jwt. Could I still publish my app in Azure?
Thank you for your comment.
Yes, you can host the web application anywhere and in Azure in particular. This is what I did and it runs well 🙂
Good Blog, I’ve a question How I can add roles or authorization policy ?
Thank you <3
Yes, if possible, I would like to see a future post explaining how to add roles to the JWT.
Congratulation on the great Blog it has great information and easy to uderstand!
Hi! Thank you for this post, quick question, how can I secure my web api call (or get the token) if my user is authenticated via Facebook?
Thanks 🙂
Hi! Thank you for your comment.
It shouldn’t be too complicated.
My code sample is using GitHub auth but you can easily replace the login part in Angular code by looking at the official documentation: https://firebase.google.com/docs/auth/web/facebook-login.
Hi Bertrand, great article! It really helped me out getting started.
I’ve managed to secure my API and also managed to get a token from my react app using firebase google sign in flow.
I’m now trying to get access to youtube api on behalf of the user from my backend, I added the scopes to my react firebase config and that’s working fine, and if I use the access token I get back directly with youtube it also works fine.
The problem is that I don’t have access to that token from my backend since I recieve the id token.
Do you have any idea how to approach this issue? I know it’s out of the scope of this article but you might know.
Thank you very much!
Hi, how to authorization ? I means we can add role to this jwt token ?
Hi there, how can we configure swagger page to use firebase?
Hi, at the top of the Swagger page there is an authenticate icon (lock), if you click on it, you can put a value “Bearer xxxx” where xxx is the JWT generated by Firebase Auth.
This is how I’m testing locally (I copy the value generated by the Angular app I can see in the network tab of Chrome console).
Hi, Thank you for sharing.
Bertrand, What about securing endpoints with Roles? Is it possible?
Like
[Authorize(Role=”Admin”)]
Thank you
nice informative post. Thanks you for sharing.
Well said and described. Thanks, for such a wonderful piece of technical information.
Many thanks Thomas
Outstanding quality article.